
It is a relatively normal thing that the shocks on any vehicle start to give you a tough time after a specific time.
This is why you must know how to adjust Bilstein 5100 to fix this problem quickly.
If the performance of shocks on your vehicle decreases, you will have various options to consider.
One of the most appealing options is to get the shocks replaced, but this will surely cost you a good amount of money.
If your budget is low, there are various aftermarket options for you. The aftermarket replacements are affordable and improve the off-road performance of your vehicle.
How to Adjust Bilstein 5100: the Steps
In the 5100s, the OEM replacement or installation is the task that a mechanic can easily do with the help of his handy tools.
A professional can conveniently complete the job within a few hours with the appropriate tools.
As per the manufacturers’ instructions, you must use a chassis hoist while dealing with Bilstein products. You must raise your vehicle at a comfortable height and hold it with a hoist.
This is necessary to ensure that your car doesn’t slip, fall or move during the installation procedure.
Even if you are not a professional but have some mechanics experience, you can follow the below-mentioned steps to adjust the Bilstein 5100 on your vehicle.
1. Disassembling
The first step in any adjustment or installment is disassembling. Therefore, you will have to disperse the front shock and the coil spring.
To disassemble these parts, you will have to look into the manufacturer’s instructions.
2. Install the Circlip
After disassembling the front shock and coil spring, it is time to install the Circlip.
Keep in mind that the circlip that you have installed is placed at the ideal ride height location. Place the Circlip perfectly into the groove with the help of appropriate tools.
In the case of the HD series Bilstein shock absorbers, you will have to install the Circlip into the position of stock ride height.
3. Installing the Spring Seat Adapter
The next step is to install the spring seat adapter. You have to do it in a way that the groove and the circlip must fit ideally on the shock body.
The groove is located inside the spring seat adapter.
As an unfit circlip can cause severe damage to the shock, you must install the Circlip into the groove perfectly. This is the groove that is present inside the spring seat adapter.
4. Reinstallation of OEM Bump Stop and Spring Seat
It is time to reinstall the OEM bump stop and the OEM spring seat.
You must follow the provided instructions while doing this task and install it only in the direction told by the manufacturer.
5. Installing New Component
After the reinstallation procedure mentioned above, a new component is also installed. This step involves installing the provided new washer onto the piston rod.
6. Final Reinstalling
After successfully installing the new washer and doing all the simple steps mentioned above, now is the time for final reinstalling.
In this step, first, you will have to reinstall the coil spring. After installing it, check for all the original upper mount parts and the upper spring hat.
Make sure to install all of these parts into their original positions.
For your convenience, you must know that these parts are to be reinstalled in the reverse order of the disassembly step.
7. Install New Lock Nut
In this step, you will have to install a new lock nut. Ensure that you don’t reinstall the old locknut as it can be damaging.
After putting the new lock nut into place, the next step is to tighten it to 45 N-m, 34 lb-ft.
8. Checking and Adjusting
The final step involves a little checking and adjusting.
In this step, after you have got all the installation done, you will have to check and adjust the front-end alignment of your vehicle.
At this point, you will know if you have been successful in changing the Bilstein 5100 or not.
Whenever performing such a delicate installation process on your vehicle, you must confine to the vehicle manufacturer’s guide only unless you are a professional.
Keep in mind that the coil spring needs to be preloaded and compressed with the help of a spring compressor to release the load.
This release of the load is necessary before you start the disassembly of the upper mount.
Make sure to stick to the instructions, or it might cause your vehicle severe damage.
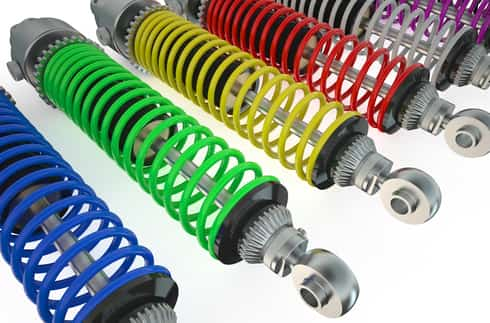
Bilstein 5100 Shocks: Features & Specifications
Bilstein 5100 are ride height adjustable shock absorbers explicitly designed for SUV suspension and front Coilover style pickup vehicles.
These shock absorbers are a priority of most vehicle owners because they are cost-effective and highly functional.
Moreover, as they are zinc-plated monotube shocks, these shocks are ideal for heavier-than-stock vehicles, lifted trucks, trucks, or jeeps that possess large wheels or tires.
This extra coating of zinc prevents debris from reaching the tube.
Bilstein 5100 shocks are ideal for off-road driving; thus, if you are an off-road enthusiast, these shocks are the ones for you.
They are accommodating if you like to trek frequently.
Although these shocks make your ride pretty firmer, they are excellent while driving through railroad tracks, potholes, and big bumps.
It would help if you kept in mind that these shocks offer a firmer ride than any stock. Bilstein 5100 shocks are excellent in off-road scenarios.
For example, if you are driving through a forest road while going camping, you must have these shocks installed in your vehicle.
Moreover, these shocks can take some additional weight; thus, if your vehicle is loaded with extra weight, you don’t have to worry as it will drive such as smoothly.
Even though these shock absorbers are a little expensive, they are ideal for hauling and towing and working perfectly in off-road driving.
All of these factors make these shocks a preferable option.
Also, the price doesn’t matter because these shocks are built to last with their exceptionally durable construction.
With these shocks, you don’t have to keep on worrying about replacing your vehicle’s shocks now and then.
Bilstein 5100 Rear Shock Installation Instructions
Along with the front shocks, Bilstein 5100 is also famous for its performance as rear shocks.
It helps heighten up your vehicle by two inches and adds up to your car’s performance, especially during off-road driving.
Therefore, we have provided step-by-step instructions on installing Bilstein 5100 rear shocks on your vehicle for your convenience.
1. Jack-up Your Car
The first step before starting the installation process is to jack up your car.
2. Remove the Wheel
Once you have jacked up your car, you will have to remove that vehicle wheel where you want to do the shock replacement.
3. Remove the Bolts
After removing the wheel, the shock assembly will be exposed to you. It is attached with bolts that are located both at the top and the bottom of the shock assembly.
First, remove the bolt present and the bottom.
To remove the bolt at the top, you will have to position an additional floor jack underneath that will help hold the assembly’s weight and then loosen the bolt.
4. Lower the Jack
After you have carefully removed the top bolt, the next step is to lower the jack slowly to get off the assembly.
5. Remove the Shock
Now, put the shock in a more acceptable and comfortable position before removing it.
6. Install the New Shock Assembly
Get the new shock assembly ready and in position to install it. Once in place, push down and compress the shock assembly and line it up in the hole for installation.
Take the gasket and put it inside the shock assembly downward. Now, push the shock down a little bit more.
Take the washer facing it down and place the nut on its top. Now, tighten the top piece as you hold the shock. Put in the bottom bolt as well.
Tighten up the top bolt. Make sure your shock assembly doesn’t twist in all this procedure.
7. Put the Wheel Back
Lift your vehicle a little bit with the help of a jack and reinstall the wheel, and you are done.
Bilstein 5100 Height Settings: Proper Settings
The Bilstein 5100 ride height adjustable shocks offer various height settings and can heighten up the front of your car by two and a half inches while the rear by a good two inches.
These shocks come with various snap-ring grooves that are located on the shock body. This wide range of tracks offers different positions for the spring seats.
This allows you to have height adjustments on your vehicle from 0 inches to 2.5 inches.
If you raise the spring seat position, you can alter the factory rake which will help you get a level front to rear height ride height.
This will happen while taking 33 inches of the diameter of tires.
These shocks can give a ride height to your vehicle because once you have these shocks installed, you don’t need any coil spring spacers.
In the case of Coilover-equipped stock vehicles, it enables you to raise the front side of the car without the coil spring spacers.
With a particular application, it can help lift the front of your car by 2.75 inches.
The nose-down rake in most stock vehicles that come this way from the factory can be easily eliminated using these shocks.
Moreover, in the case of trucks and SUVs, the Bilstein 5100 can also lift the vehicle higher to have more ground clearance to install additional and more oversized tires.
Bilstein 5100 uses the stock coils of the car. With the adjustable Circlip, you can select one of the four heights this shocking series possesses.
FAQs about Adjust Bilstein 5100
Can you adjust Bilstein 5100 after they are installed?
In the case of Bilstein 5100 front shocks, there is a groove in the shock where the ring sits. The perch is set up on this.
If you want to adjust the Bilstein 5100 shocks once they are installed, you will have to disassemble the shock assembly.
After changing the height setting according to your requirements, you will have to reinstall everything once again.
Are all Bilstein 5100 shocks adjustable?
The answer to this question can also be positive and negative. There are 5100 series shocks in the Bilstein series and the 5100 series ride adjustable struts.
A surprise cannot change the ride height, while a brace can do the task efficiently.
In the case of shock series, an extended length over shock stock absorbers provides a significant lift to the vehicle.
Do Bilstein shocks raise height?
The Bilstein 5100 series enables you to have a good lift for your trucks or SUVs, making them quite popular among people with huge vehicles.
If you want to fit larger tires on your car without getting a complete lift kit, this Bilstein 5100 ride height adjustable shocks are an excellent option for you.
How many miles are Bilstein shocks good for?
If you don’t use your car very much or use it mostly for highway drives that do not involve any towing, you can get around 100k miles quickly.
In the case of rough driving that involves off-road experiences and towing, you can expect these Bilstein shocks to last for about 75k miles.
How good are Bilstein 5100 shocks?
Bilstein 5100 shocks are pretty popular among truck and SUV owners and mechanics.
One of the reasons behind this popularity is that it is a less pricey option than the other options available in the market.
Moreover, these shocks are a preferable option compared to the spacers as they tend to mess up with the suspension travel of your car.
They also heighten up your vehicle in case you are looking to install tires of larger sizes.
How often should I replace my Bilstein shocks?
The shock absorber manufacturers suggest that you get your shock absorbers replaced every 50,000 miles.
You can also have them inspected after 50,000 miles and then annually after this checkup.
Conclusion
Bilstein 5100 series are one of the most famous series of shocks that are a cost-effective option and high performance.
They help you improve the overall off-road experience of your vehicle by making it stiffer and taking the wear and tear that rough areas have to offer.
Therefore, if you want to know how to adjust Bilstein 5100, you can look through the above-mentioned comprehensive guide.
Indeed, you will get a better idea of the whole process.
Although it is not a highly complex process, you might want to go to the mechanic if you don’t have any experience in the field.
If not, you must follow the manufacturer’s guide step-by-step so that you don’t have to face any damage that can be done to your vehicle in case of a messed-up installation or adjustment.