
Do you really know how to clean idle air control valve without removing? This is a simple procedure that can enhance the efficiency of the motor of your vehicle.
In fact, the idle air control valve is a part that can get clogged with carbon debris.
Therefore, here you can learn the correct manner of cleaning such a piece.
Moreover, you will avoid any beginner’s mistake in it. We will discuss what this valve is about and how it works.
Finally, we have investigated the process and cost of replacing this valve. Also, we provide the correct answer to many frequent doubts about this subject.
You just require a handful of supplies to accomplish the clean-up. Get your cleaning supplies ready and get to work.
How To Clean Idle Air Control Valve Without Removing With 05 Easiest Steps
Cleaning this valve does not require a lot of materials or a lot of effort, regardless of the experience of the vehicle user.
However, some basic aspects should be considered to obtain a safe result. This involves using safety equipment such as eye protection or chemical corrosion-resistant gloves.
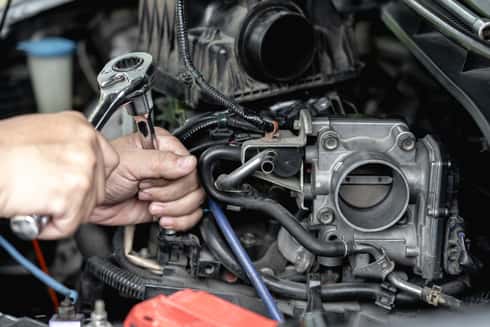
Step 1. First steps to finding the valve
Among the most important aspects to begin the cleaning procedure is the preparation of the entire area.
Before performing any type of task, the vehicle should not be used for several minutes before this process.
Otherwise, the engine or other related parts will be too hot to work in this area.
Even if the user has the appropriate safety elements in place, they are usually not prepared to withstand the high engine temperatures.
Therefore, the engine should be as cool as possible. While this may seem obvious, many people suffer one or more unnecessary burns from a too hot engine.
Having considered this, the user shall use security gloves and protective glasses.
Finding the idle air control valve can be somewhat difficult if this procedure has not ever been performed on your vehicle.
Many users begin this procedure by locating the area where the filter box is located, a large box.
The duct must be visually followed along with the mass airflow sensor to get into the engine and the valve.
Therefore, this valve is found near the accelerator body. On many vehicles, this valve is connected to this same throttle body.
However, this may vary depending on the manufacturing design of each vehicle.
Step 2. Remove the air duct next to the filter housing
To work properly on the valve, some parts must be removed. In this case, the important thing is to remove the air duct and the filter box that prevent access to the work area.
To do this, each clamp responsible for fixing in place and immobilizing the filter box must be removed, which will allow the proper removal of this part.
It is also important to check the mass airflow sensor and each of the wires that hold this part in place.
The air duct is another part to deal with because of the vacuum lines connected.
All of this also needs to be removed away from the way and the PCV hose. This last piece connects precisely to the wider air duct.
Step 3. Disconnecting the clamps
To perform this step, a suitable screwdriver must be available. The user must remove the air hose by removing the clamps in charge of fixing this part in place.
The screws may have a special shape that requires a specific screwdriver depending on the vehicle manufacturer. Both the screws and the air hose should be stored safely.
If the user has performed all steps correctly, both the throttle body and air filter should be exposed.
It may also be appropriate to check the condition of the air filter. This is a small enough symptom to produce an erratic idle.
The user can substitute the dirty air filter or simply wash it if it is a filter that can be reused.
Step 4. Passage to the valve
As mentioned above, the idle air control valve is usually connected to the throttle body.
Of course, this depends on the vehicle’s design according to each manufacturer.
That is why it is possible to notice a passage or hole in the throttle body, and it is necessary to check the hole inside this part to do so.
It is an important passage to divert the air into the engine from the air duct. All this happens exactly when the vehicle is not active.
A certain amount of carbon or similar debris can easily accumulate in this hole. If this is the case, the proper cleaning must be the next proper step.
Step 5. Clean the area and finish the process
There are many cleaners available for the throttle body or air intake to clean this area.
Also, it is useful to have some type of wire brush. A suitable option is those brushes made of plastic that cause less damage to the cleaning area.
The important thing is to remove all carbon build-up in this area.
When the cleaning is complete, each of the parts, clamps, screws, and wiring must be reconnected.
To reinstall each part in its proper place, this same procedure can be followed in the opposite direction.
Each part must be properly adjusted to avoid improper operation when using the vehicle.
Idle Air Control Valve: What & How Does It Work?
All vehicles have a combustion chamber inside. Inside this combustion chamber, fuel and air are combined.
This is the necessary combination that produces the power of the engine.
So, this requires a set of parts that allow air to enter the combustion chamber from the outside.
One part that allows airflow into the engine is the idle air control valve, and this part closes and opens as many times as necessary to control airflow into the vehicle.
Any vehicle also has a wide variety of similar valves that control the passage of different fluids.
In addition, this valve is one of the most important valves to set when an expert user wishes to calibrate the air/fuel mixture in the engine.
The setting of this valve can allow for a higher power level or a fuel economy more appropriate to the user’s budget.
When this valve suffers from blockage, engine power can drop. This can happen due to an unbalanced mixture between air and fuel in the combustion chamber.
Idle Air Control Valve Location: Where Does It Locate?
As we have mentioned, this valve is a fundamental part of mixing air and fuel in the combustion chamber, and that is why this valve is located very close to the throttle body.
The combustion chamber and the idle air control valve are connected to a vehicle with a fuel injection engine.
Thus, the accelerator pedal is activated to close or open the valve.
We can also find the location of this valve in other different places, although this is not the most common nowadays.
Idle Air Control Valve Replacement: The Complete Procedures
Cleaning this part of your car may be the best way to reuse the same piece. However, sometimes it is necessary to spend money and purchase a new valve.
So, if you need to replace this valve properly, you need to follow some simple steps such as the following.
Step 1: Preparation and location of the valve
This procedure also requires proper safety equipment, such as goggles and gloves.
It is also necessary to be cold, so the vehicle should not be used before this process.
Only disconnect the battery by removing the black cable from the negative terminal.
According to the design of many current vehicles, the part is plugged into the intake manifold or accelerator body.
So, it is necessary to get there to perform parts replacement.
Step 2: Remove the valve
The wires connected to this part must be removed when the valve has been located.
There is a clip that must be disconnected to completely free the electrical terminal of this part.
This may require any pair of pliers. The user should also consider bolts that hold the valve in place.
Therefore, both the wires and the screws must be pulled out to detach the piece.
It is recommended to properly clean the entire area where the idle air control valve is installed, allowing for a longer service life for the new valve.
Step 3: Assemble the new part
Simply, the new valve must be installed, incorporating each one of the wires in the appropriate places and the bolts.
It is advisable to remember the location of each of these parts to install the new valve without problems.
Finally, reconnect the battery and start the engine to check the operation of the new part.
Idle Air Control Valve Replacement Cost
Because it is an important part of the air/fuel mixture, replacing the valve is necessary from time to time.
When considering the cost of this part alone, the total amount can vary between $70 and $400. Of course, the final amount depends on the manufacturer and each car model.
In turn, the labor required to do this task is between $50 and $100.
So, learning the procedure to replace this valve means spending $100 less of your budget.
In any case, it is highly recommended to count on expert labor if the user is inexperienced or does not have the appropriate safety elements.
We have also not considered additional costs in this budget. Some of these costs relate to the protection of gloves and goggles.
How To Clean Idle Air Control Valve Without Removing It
FAQs About How To Clean Idle Air Control Valve Without Removing
Can anyone clean the IAV valve?
Of course, anyone can clean this valve if they follow the correct steps. However, before performing this process, the proper safety elements must be in place.
Even the person in charge of cleaning the valve must check that the engine is cold to avoid any kind of burn.
Once the person finds the valve, he/she must remove each one of the clamps, bolts, and wiring.
Here, compressed air can be used, or the part can be completely submerged in gasoline.
Once the cleaning has been done, each wire must be connected to the correct places.
Disconnecting the battery before cleaning also provides an extra layer of safety.
Can I unclog the IAC valve?
The idle air control valve is one of the vehicle’s parts that can become partially or completely plugged with carbon or other debris.
So, it can be very useful to learn how to unclog this valve and apply a proper cleaning. It is advisable to have a throttle body and air intake cleaner to do this.
To unclog this valve, you must hold this part down. This is where the cleaner should be used, removing as much carbon as possible.
The remains of this waste should not drip and remain inside the housing.
Can I disconnect the IAC valve?
The idle air control valve is set up to work together with the rest of the engine parts, and that is why disconnecting this part can cause different problems with an idle engine.
One of the most common situations is that the engine slows down or increases the revolutions per minute.
Can I use WD40 for the IAC valve?
One of the best ways to clean the idle air control valve is to have the right cleaner for it.
The cleaner that many people tend to use is the cleaner for the air intake and throttle body.
It also requires plastic wire brushes or similar wire brushes to complete the cleaning of this valve.
Using WD40 may be appropriate for cleaning the entire area where this valve is installed.
However, this implementation is not necessary for complete and proper cleaning.
Can cleaning the IAC valve damage the starter?
Some errors may have occurred when the vehicle could not start after cleaning this valve. The problem in starting may be too little or too much air.
So, in this case, the best solution is to set the valve operation for a balanced mixture of air and fuel in the combustion chamber.
Can I test the IAC valve?
Checking the operation of this valve is important to have a problem-free engine. Before testing this part, the cleaning mentioned above should be applied.
Then, this valve must be removed after removing the wiring and clamps. This allows checking if the valve has any damage in its parts.
Verdict
As we have seen, some basics are required to know how to clean an idle air control valve without removing it.
This means having protective eye goggles and safety gloves. Working inside a vehicle’s engine means being in contact with different fluids that can be harmful to anyone’s skin.
Also, it is recommended to get enough training and experience before working with vehicle parts.
This is because these parts must be properly installed after being removed.
If these parts are improperly installed or adjusted, more than one problem can occur when the vehicle is used again.
In any of these situations, it is always advisable to have an expert mechanic to avoid major inconveniences.
